This post contains affiliate links to products, services, or education. We may receive a commission for purchases made through links.
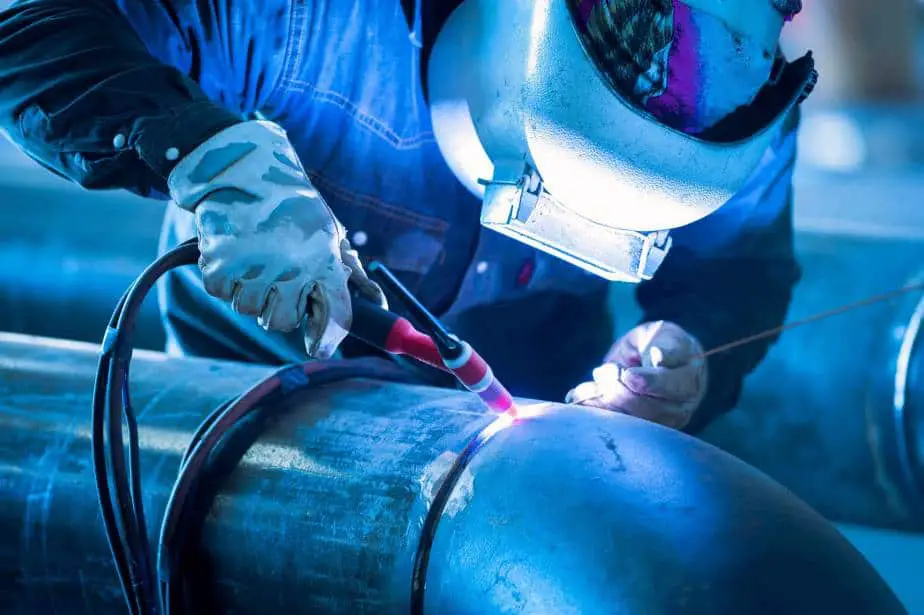
If you are an experienced welder, you know a TIG weld provides a clean, penetrating, quality seam that adds strength and a consistent appearance to the weld. Back purging provides those same professional results on the backside of hollow objects such as tubes, pipes, or cylinders, where a torch cannot reach. Back purging is a simple process and with just a few extra steps, you’ll get the same quality results on the inside of your project as on the outside.
How to back purge when TIG welding.
- First, you need to seal both ends of the pipe or tube you are working on. You can buy blocks or dams or make your own.
- On one end, attach your seal with a tube connected to your argon tank.
- Cover the other end with a seal that will let the oxygen out but keep the argon from escaping.
- Keep the argon flowing during the weld using two separate lines from the argon bottle. A dual regulator is strongly suggested, but back purging can be done without it.
To back purge or not to back purge depends on the type of metal you are using and the method of welding. Cost and time may also be a concern when it comes to deciding whether to back purge. This is a guide to explain the ways you can produce quality results, when back purging, and still stay under budget.
When Should you Back Purge Your TIG Weld?
When you weld a corrosion-resistant metal, the weld is exposed to oxidation. Corrosion-resistant metals include:
- stainless steel
- titanium
- nickel
- zirconium
Once the metal is exposed to oxidation, it is no longer corrosion-resistant, and the weld weakens the overall structure of the pipe or tube. In a TIG weld, argon, or another gas such as helium, flows through the welding cup to flood the seam and push out the oxygen. This prevents oxidation on the top surface, but the underside is still exposed.
Generally back purging is used on hollow objects like pipes and tubes. Back purging is probably a good choice anywhere your torch can’t reach but you want to ensure your weld is:
- strong
- smooth
- corrosion-resistant
Back purging is commonly used with metals such as austenitic stainless steel, but back purging is a good idea anytime you need to ensure the reliability of your weld.
Here is a great video that explains the in’s and out’s of back purging while TIG welding:
What is TIG welding?
First and foremost, if you need an in-depth look at TIG welding, be sure to check out our article on what it is and why it’s used here.
In the 1940’s, the welding techniques being used at the time did not work well when combining different alloys such as aluminum and magnesium. Russel Meredith of Northrop Aircraft in Southern California developed the heliarc welding process using a tungsten electrode and helium as a shielding gas. Later this became known as Tungsten Inert Gas (TIG) welding. You may also know it as Gas Tungsten Arc Welding (GATW) or fusion welding. Doesn’t matter what you call it, it’s all the same process of welding.
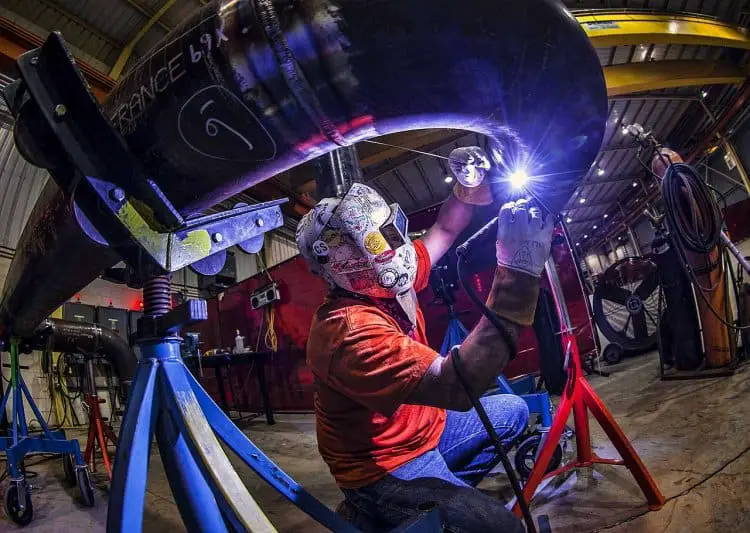
TIG welding is often used in hollow objects. We are talking about:
- Tubes
- Pipes
- Cylinders
- Any hollow object where your torch can’t reach
TIG welding works best when joining thinner metals. It gives your weld a smoother external appearance. Because TIG welds are smoother, more reliable, and corrosion-resistant, this process is used in the nuclear industry where consistent dependability is vital. TIG welding is also used in the food, pharmaceutical, and automotive industries where a quality weld is essential to the integrity of the whole system.
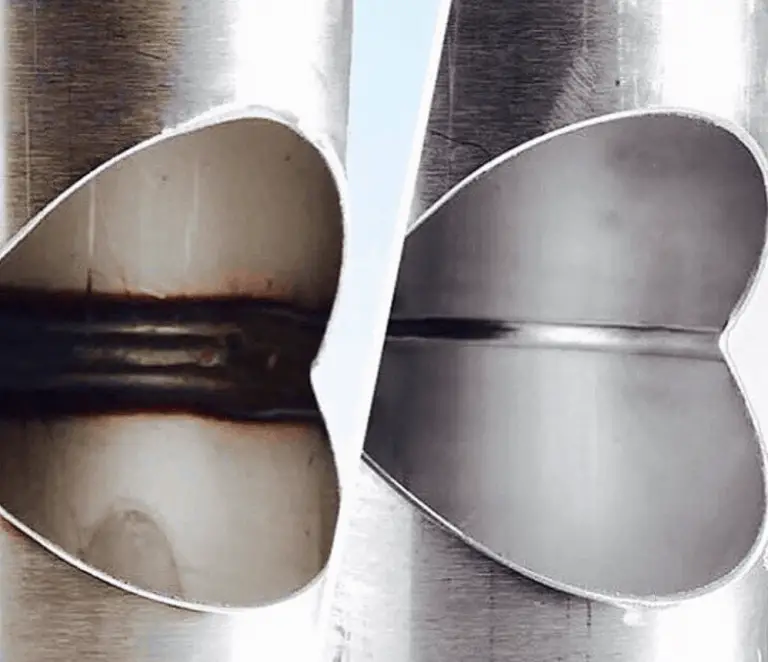
The strong, even weld you get from a TIG weld is exactly why back purging is so important. Back purging provides the same smoothness inside as you see on the outside. When you do the root pass, your cup provides the shielding gas that gives you that exceptional weld on the outside.
Without that same gas to shield and protect the underside of the weld, the filler and the exposed metal will bubble and crack, making a dirty weld.
Such a dirty weld inside a pipe or tube weakens it and makes it more vulnerable to cracks or leaks. The pits inside can also trap bacteria which means more maintenance will be needed to keep it clean and up to code. In addition, a coarse surface may affect the flow rate of whatever is being pumped through it. The condition that causes this nasty situation is called carbon precipitation, but you may know it as
- sugaring
- granulation
- cooking
- weld decay
Whatever you call it, back purging smooths and seals the underside of the weld, virtually eliminating these problems.
Tools to Back Purge a TIG weld.
You are going to need a few tools to start your back purging.
- An Inert Gas Source
- Regulator or Metering System
- Something to Seal the Ends
1.An Inert Gas Source
Argon is most commonly used. Other gases such as helium and nitrogen can be used alone or added to the argon mix to improve the results if needed. Argon as well as nitrogen and helium, can be used in back purging. Which gas you use for your back purging will depend on the type of metal you are using.
According to a report from the AWS (American Welding Society) in 1975, there is no significant difference between using nitrogen or argon in your welding. Helium is more expensive than argon, but it works better on thicker metals. Because helium can be used at higher temperatures, it may allow you to work faster. Sandvik has some good recommendations for which shielding gases to use.
2.A Regulator or Metering system
A dual flow meter is suggested but you can use a “Y” connection from your argon tank. A flow meter will give you an accurate reading to ensure the gas is encompassing the weld. You want to keep the pressure inside the pipe greater than the outside. The flow rate on a back purge varies around 40 CFH (Cubic Feet Per Hour) and the torch flow rate varies to around 10 CFH. The ratio is normally 4:1. Check with the AWS requirements or the job specifications for proper flow rates.
3.Something to Seal the Ends
Back purging pushes out the atmospheric gas (oxygen) and replaces it with an inert gas (argon). You need some way get the oxygen out and not let it back in. You also need to keep the argon in place and flowing. To keep the gas in place, you need to cover up the ends of the area you are working on. A better dam can give you better control over your flow rates and reduce the amount of gas needed to do the back purge.
Steps to Back Purge a TIG Weld
Now that you have your tools gathered, there’s still some work to do before you start welding.
- Prep
- Match Your Selections
- Block the Ends to Trap the Gas
- Make an Escape Route
- Tack Weld the Pieces
- Get Ready
- And Go
1.Prep
Clean and degrease the whole area where you’ll be working, inside and out. Don’t forget to clean the ends where the dam will be. You can use the following chemicals to clean your surfaces:
- Acetone
- isopropyl alcohol
- commercial cleaning agents
These chemicals are harsh, so be sure to wear gloves when handling them. Avoid cleaning solutions containing chlorine and abrasives such as steel wool. Chlorine reacts with some metals and steel wool can contaminate the metal surface. Remember, the better the clean, the better your weld.
2.Match up your sections
Check and doublecheck the fit of your pieces. You want a smooth, uniform fit. Sand the pieces so that the parts butt up to each other tightly. Remove any irregularities or excess material so your joint is good and tight. Make sure to wipe down each end with acetone so all contaminants are removed. A better joint fit now will further ensure your weld and especially your back purge is durable and smooth.
3.Block off the Ends to Trap the Gas
You’ll need a plug with a tube attachment to connect one end to the gas tank. On the other end, you will need a dam of some sort. The dam can be just about anything. You can buy one of the many options available in the market or you can improvise and make a back purging dam yourself.
Let’s look at some of the options available.
- Purge Plugs-These plugs act as a dam by fitting securely inside the tube.
- Dam Paper– Also known as purge paper, this material comes pre-cut or sold in sheets. This product is water-soluble and can be flushed out when your back purging is done.
- Dam Film– Same idea as the dam paper. The film allows you to see the progress of your weld from the inside. When you are done, flush it way with water or steam.
- Inflatable Purge Bladders-Because these dams inflate, they are adjustable once they are placed inside the pipe. Usually connected by a tube, they can reduce the amount of area needed to be filled by the argon gas.
- Purge Box– This is useful for welding small parts that are difficult to seal and back purge. A purge box provides full argon shielding that allows you to back purge even the smallest items or most awkward angles. Purge boxes are commercially available, but if you want, there are instructions online for building your own.
- Aluminum tape– Specially designed for welding, aluminum tape is halogen-free and heat resistant.
- Other options– Welders have used anything from aluminum foil to rubber gloves to create a dam. Whatever material you use for your back purging, make sure it is heat resistant and free from contaminants such as halogen and other metals.
Here is a cool video showing exactly how one guy uses aluminum foil (for the budget conscious):
4.Make an Escape Route
Whatever type of block you use to create a seal for your back purging, you need to have some sort of some sort of vent for the atmospheric gas to escape. Venting is important. If you don’t have a way for the oxygen to exit, the gases mix and build up. They will try to escape through the only opening, which will be the weld you are working on and possibly cause an explosion.
5.Tack weld the pieces in place
You don’t want your pieces to move around when you are welding. Make several small tack welds spaced along the diameter of the object to keep things in place while you do the final root pass weld. Be careful not to add too many tack welds as they can cause weld decay before you even start.
6.Get Ready
The gas chamber needs to be filled with argon before you start your weld. Be patient. Turn on the gas regulator and wait about 30 seconds for the chamber to fill completely with the argon. Remember argon is a heavy gas and will fill from the bottom up. If you are using helium, a lighter gas, it will flow in from the top. Use your flow meter to ensure you have the right levels.
7.And Go
When the gas has completely filled the chamber, the inside of the tube should be shielded and ready for you to start welding and back purging.
Why is Back Purging Necessary in TIG Welding?
Stainless steels, and alloys with titanium, nickel and zirconium when heated to high levels, react to water, grease, and gases floating free in the environment among other things. This reaction causes the filler used in the weld to mix with the contaminant and oxidize or sugar. This contaminated weld creates an ugly, weak surface affecting the integrity of the weld.
TIG welding provides a constant shield when welding from the top side. The TIG method works fine for the outside of the weld. Not only does it create a stronger weld, it looks good too, but only on the outside; the side you see.
To get a stronger, more dependable weld that is just as smooth on the inside as on the outside, you need to produce that same shielding environment on the inside as you do on the outside. Back purging shields the underside of the weld from the elements in the surrounding atmosphere. This gives the root weld a stronger seam and a smoother surface on both sides.
With back purging, that same even finish that is visible on the outside is created on the inside of the seam. This makes for a better weld that results in better flow rates and virtually no chance of contamination.
Alternatives to Back Purging
For some people, out of sight, is out of mind. If they don’t see the bad weld, then why bother fixing it? Sometimes using gas for back purging may not be the best or most cost effective choice. Neither of these are good reasons to not back purge. There are several alternatives to using argon gas for back purging. A few options are listed below. Which method you use depends on how your project will be used. As with any project, you should make sure the final product is thoroughly cleaned and any residue removed.
- Welding Flux- Flux (is a fine powder that is mixed with methanol to create a paste. The paste is applied to the backside of the root weld. If you choose this method, be aware that the welding process will leave slag on the underside of the weld. You need to make sure this is removed, and the weld is thoroughly cleaned. Solar Flux comes in two different formulations. Type I is used for welding high nickel super alloys. Type B is used for welding alloy steels and stainless steels.
- Flux Coated Wire– These wires come in two versions. The self-shielded flux-cored wires (FCAW-S) produce their own gas during welding. The gas-shielded flux-cored wires (FCAW-G) need an external gas shield. Both produce slag which must be cleaned away.
- Fiberglass Insulated Aluminum Weld Backing Tape. This aluminum tape has a center of fiberglass that creates a shield around the weld. The tape is easy to use. You simply cover the root gap with the tape. The fiberglass creates a seal that doesn’t allow oxygen or other atmospheric gases in, preventing oxidation and weld decay.
Back Purging Benefits
- Back purging provides full penetration of the root gap. This in turn leads to a stronger weld.
- The metals and elements mixed with stainless steel alloys can react with heat and other atmospheric gases. This causes porosity in the weld, making it weak. The argon shield used in back purging prevents this from happening.
- Back purging eliminates extra hours of work.
- Back purging gives the weld inside a smooth surface, giving consistent flow rates.
- The smooth inside surface provided by back purging prevents gaps and holes where bacteria and other contaminants can hide.
- Back purging prevents gaps and leaks which can cause the cracking and breaking.
Back purging strengthens the whole weld. Corrosion-resistant metals such
- stainless steel
- titanium
- nickel
- zirconium
are only corrosion resistant as long as the base metal is clean, pure, and uncontaminated. The shielding flow of an inert gas be it argon, helium, or nitrogen, in TIG welding protects the surface root weld, but leaves the underneath surface exposed. This is easy to fix in flat surfaces. Hollow objects such as tubes and pipes are vulnerable to oxidation on the hidden underside. Without back purging, the weld looks great from the outside, but will ultimately fail.
If you are unsure of which metals need back purging, you should always refer to a WPS (Welding Procedure Specification) for coding specs and guidance. Back purging takes a little more time to prepare and can add to the project cost initially. However, the quality and reliability of the overall work, will pay off.