This post contains affiliate links to products, services, or education. We may receive a commission for purchases made through links.
So, you’re thinking about learning some torch welding? Torch welding is a common form of gas welding that uses a mixture of oxygen and hydrogen to create a hot flame. By learning the fundamentals of torch welding, you’ll be taking the initial step toward becoming successful at many other types of welding projects. Keep in mind that it can take time and effort to master welding, not because welding is difficult, but because there is a lot of knowledge involved when it comes to maneuvering your torch.
So, how do you weld with a blowtorch? Once you understand some basics about the torch and methods used in torch welding, we’ll discuss how to weld with a blowtorch by using these steps:
- Grab your safety gear
- Get your work space ready
- Clean your materials
- Light the torch
- Modify the size of your flame, and
- Put the flame to your weld
Since there isn’t much information available on the Internet today covering how to weld with a blowtorch, we created this article to help fill the information gap for you. Below we’ll cover the background on torch welding, some of the fundamentals about torch welding, the parts involved with torch welding, and the steps you’ll need to take when you want to complete a torch welding project.
Blowtorch Welding: A Background

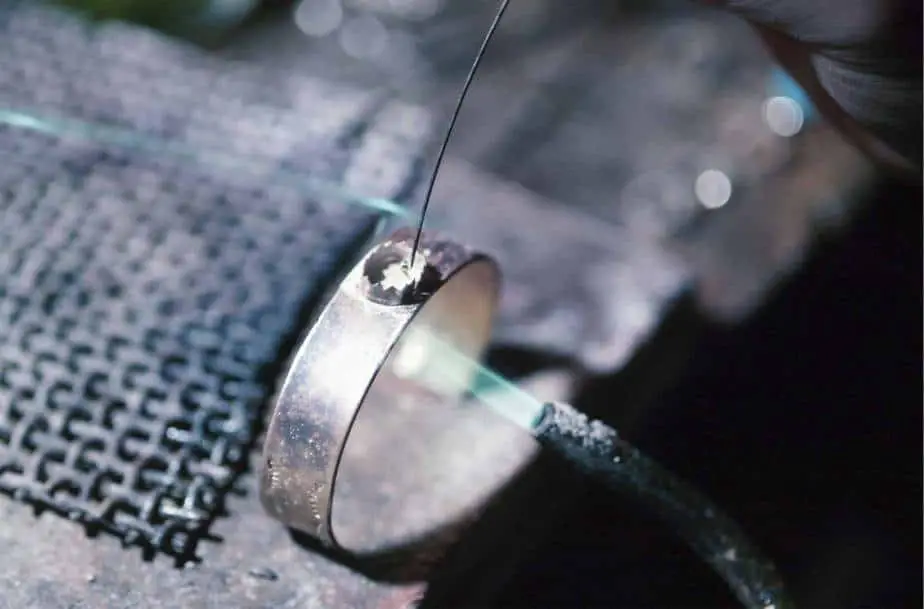
Blowtorch welding, also known as gas welding, initially started back in the 1800s. At that time, a mix of hydrogen and oxygen would be used to create a hot flame that was then used to create pieces of jewelry. However, torch welding received a significant technological boost during the late 1890s because Acetylene gas first became available, and that allowed welding to become the activity that we now know it as today.
The availability of Acetylene gas changed the entire scope of welding. This particular gas is made by combining Calcium Carbide with water. When one burns acetylene alone, they can create a flame that has a temperature of as much as 4000 degrees F. By adding oxygen into that mix, and you can increase the heat of the torch to about 6000 degrees F. So, Acetylene is excellent for both welding and cutting.
One of the reasons why blowtorch welding is so popular is because it utilizes an Oxy-Acetylene outfit, which is more affordable, more comfortable to transport, and more versatile than the traditional electric welding outfit. Also, as long as you have the right tips, fluxes, and rods, you can weld just about any metal imaginable using a torch and the Oxy-Acetylene gas.
Here’s a fantastic intro to Oxy-Acetylene welding by the We Build Stuff team.
How Blowtorches Work with Oxy-Acetylene Gas
To give you a better understanding of how the process works, the torch unit makes its heat by burning acetylene gas. If you add oxygen to that, then you can get your torch to make temperatures that are close to 6000 degrees F. Torch units are also versatile and come as one piece of equipment. A torch can act as its portable heating source that can weld, braze, cut, heat, and handle all kinds of metals. Before the invention of electricity, the blowtorch was the only welder around.
The standard blowtorch has two high-pressure cylinders feeding it, one for oxygen and the other for acetylene. There will also be two adjoining pressure regulators in the torch. Inside the torch, you’ll see a dual-line hose that can move the oxygen and acetylene from the regulators into the torch’s flame.
On the torch’s handle, you’ll be able to hold a cutting attachment, heating tip, or welding tip. Remember, most basic torches do not come with heating tips. If you are planning to cut with your torch, you’ll also need a cutting tip for your cutting attachment. Your cutting tip will help you control how thick you are making your metal, as well as the gas pressure and regulators.
Torches that feature both oxygen and acetylene all reach a working temperature of 5,620 degrees F. Your cylinder’s size won’t affect how hot the flame gets. However, it will change the overall burn time of the fire or how long the fire will continue to burn.
Whenever you weld with a torch, you’ll need to make sure you also have all of the correct safety equipment. Make sure you have safety goggles to shield your eyes, welding gloves for your hands (check out our recommended gloves here), a welding jacket, long pants, and covered shoes.
You also need to make sure the tip of your torch is clean to prevent popping (read more about welding torch popping causes and fixes here). Make sure you have your torch tip cleaner handy.
You should also purchase a hand-held striker if you don’t own one, which will help light the acetylene, and a cylinder cart so you can hold everything you need for your cylinder (check out our recommended cylinder carts here).
Now that we’ve covered some information about how blowtorches work, we’ll cover the different types of blowtorch outfit processes you’ll have to pick from whenever you decide to weld with a torch.
Types of Blowtorch Outfit Processes
The most common reason for using a gas torch outfit process is for cutting. After that, many people use torches for heating, fusion, and brazing. We’ll cover the different types of torch outfit processes below, along with the advantages and disadvantages you’ll encounter when you use each method.
Blowtorch Gas Cutting
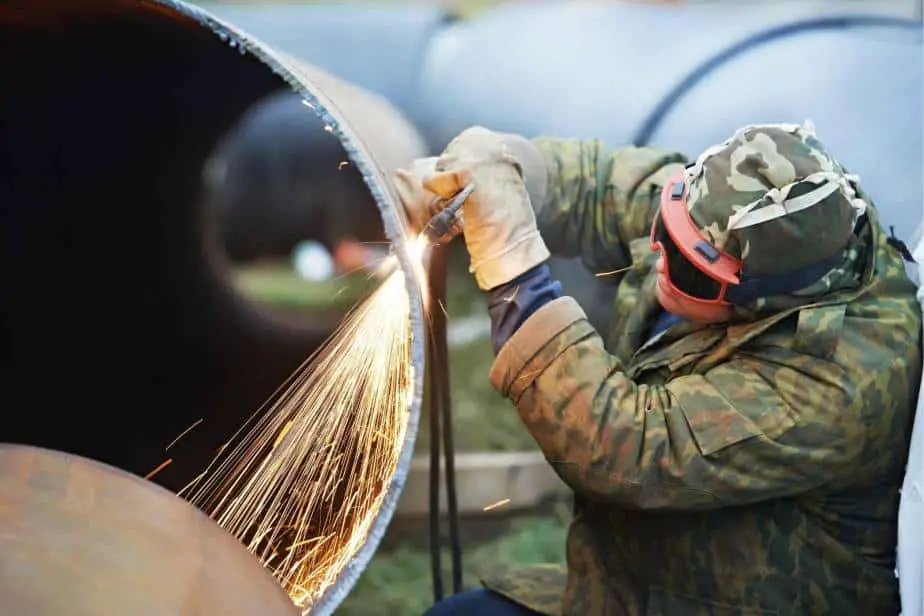
The most popular use for the gas torch outfit is for cutting metal. Your torch includes a cutting attachment that you can connect to your torch handle, and it will hold your cutting tip. The attachment and tip burn acetylene combined with oxygen, and that helps to heat the metal. Once that happens, you can use the cutting oxygen lever, which will deliver some oxygen and cut into the metal.
The Pros of Blowtorch Gas Cutting
The advantages of blowtorch gas cutting include:
- An easy-to-use, portable torch that you can carry with you and use anywhere.
- Your torch can cut through incredibly thick metal with several cutting tips. These tips are sold separately from your torch, so if you don’t own them, you will need to purchase some.
- Blowtorch cutting doesn’t need much skill to accomplish and can be learned quickly.
The Cons of Blowtorch Gas Cutting
The disadvantages of blowtorch gas cutting include:
- Once you combine the oxygen-acetylene gas, you can only cut iron-based steel.
- Using a blowtorch for cutting can distort thin metal if you don’t utilize the right cutting tip.
Blowtorch Gas Heating
The second most used process for your blowtorch is gas heating. For gas heating, you’ll need a gas heating tip, which is also called an MFA or a rosebud. Typically, these gas heating tips don’t come with your basic torch outfit and comes sold separately. So, if you plan on using your blowtorch for gas heating, you’ll need to purchase this tip.
Once you have your gas heating tip, you can easily attach it to your torch handle. On the tip, you’ll see several holes that allow many flames to come out of the tip. With these flames, you can heat a massive area of metal very fast, which will make it easier for you to bend and straighten the metal.
The Pros of Blowtorch Gas Heating
The advantages of blowtorch gas heating include:
- The blowtorch is the fastest tool you can use for heating metal.
- Your torch is very portable, and you can use it anywhere.
- It’s easy to learn how to use a blowtorch for gas heating.
The Cons of Blowtorch Gas Heating
The disadvantages of blowtorch gas heating include:
- You’ll need to utilize a vast amount of oxygen-acetylene to heat your tip.
Blowtorch Gas Welding
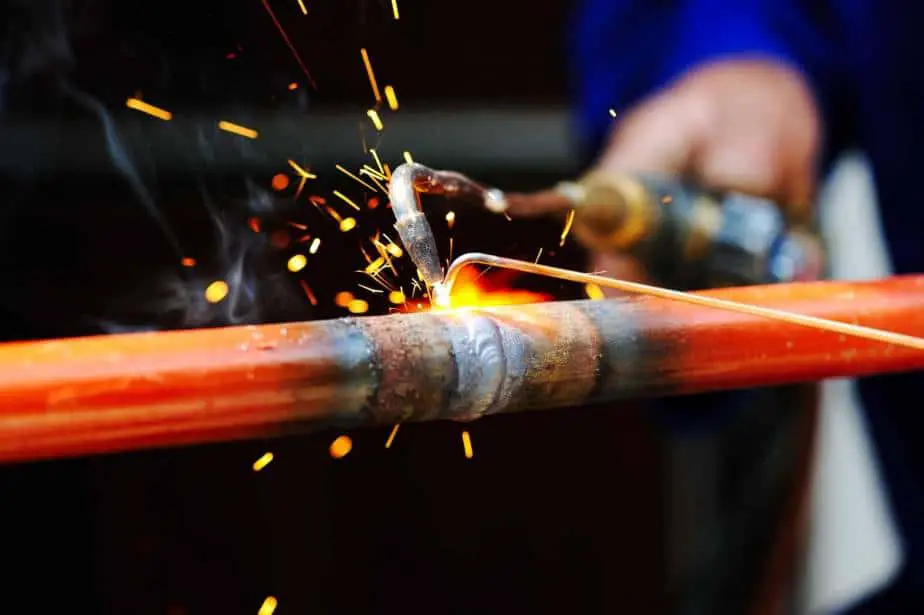
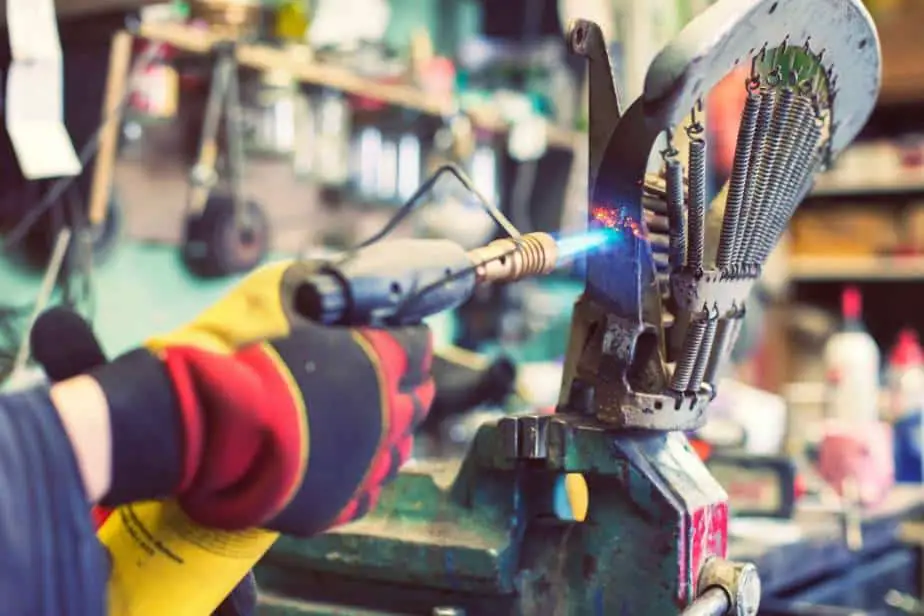
The next most common reason for using a torch is for blowtorch gas welding or fusion. You’ll need a gas welding tip for this process. Attach that gas welding tip to your torch’s handle. Then, heat the flame, so the base metal starts puddling. Then, the gas welding rod, which is usually comprised of copper-coated steel, should be tapped into the welding puddle. Your rod will fuse to the base metal, and the weld starts to form until the two pieces are one piece of metal.
The Pros of Blowtorch Gas Welding
The advantages of blowtorch gas welding include:
- You’re working with a portable torch that can be taken anywhere and used.
The Cons of Blowtorch Gas Welding
The disadvantages of gas welding include the following:
- Blowtorch gas welding requires the use of two hands, so it takes some skill and practice to learn.
- You can only use this on iron-based steels.
Blowtorch Gas Brazing
The last reason why many people use blowtorches is for blowtorch gas brazing, which is an adhesion process. For this process, you’ll need your gas welding tip. Attach that gas welding tip to your torch handle. Then, the flame should start heating the base metal, but don’t let it melt that metal. The rods are then dipped in brazing flux. Then, you’d begin melting them using the heated base metal. The melted brass creates a bead on the base metal that you’ll use to attach the pieces.
The Pros of Blowtorch Gas Brazing
The pros of blowtorch gas brazing include the following:
- Your blowtorch is versatile when it comes to brazing, and you can use many different materials for brazing.
- Also, your blowtorch is very portable, so that you can take it anywhere and easily use it.
The Cons of Blowtorch Gas Brazing
- Blowtorch gas brazing requires two hands and a decent skill level for you to master.
Now that you understand the different processes you can use your blowtorch with when you are performing a welding project, we’ll move onto discussing some of the various parts inside of the torch. That way, you’ll understand more about the blowtorch gas welding process. After that, we’ll move onto give you a step-by-step overview of how you can weld with your blowtorch.
Components of an Oxy-Acetylene Blowtorch
Understanding the different parts of the oxy-acetylene welding blowtorch can make it easier for you to grasp the process of welding with one. So, we’ve listed some of the most critical components in these outfits, describing what they do and how you’ll use them when you weld or cut metal. After you understand the parts of your blowtorch, you’ll be ready for our steps on how to weld with a blowtorch.
Component 1: Cylinders
The steel cylinders inside of the blowtorch store both the oxygen and acetylene, which are both under pressure. These cylinders are sized either by their cubic feet, or the amount of the gasses they hold. You’ll need to make sure you test your cylinders regularly and look at the last test stamped on the cylinder’s top. Also, make sure you always secure your cylinder and use it while the cylinder is upright. When you aren’t using a cylinder, make sure you have the valve cap on the cylinder.
You’ll have at least two cylinders with independent lines feeding your torch, one for oxygen and one for acetylene.
Oxygen Cylinders
Oxygen cylinders are made from steel and are distinguished by the green painted on them. Oxygen cylinders can be as small as twenty cubic feet, or as substantial as three hundred cubic feet. Oxygen cylinders have compressed oxygen inside of them at all kinds of pressures. With oxygen, putting the valve cap on the cylinder when it isn’t in use becomes vital because if oxygen contacts oil or grease, it can create a fire.
Because it could ignite, you should never use oil or grease on or near your oxygen cylinder. You’ll also need to ensure that your hands and gloves don’t contain any oil or grease before you use the cylinders. When you want to clear the valve of dirt, open the cylinder’s valve and then close it before you put the regulator in it.
When you have the regulator installed, crack the cylinder valve open first, then fully open it. You won’t have to worry about recompression issues if you approach your torch’s cylinder this way. ,
Acetylene Cylinders
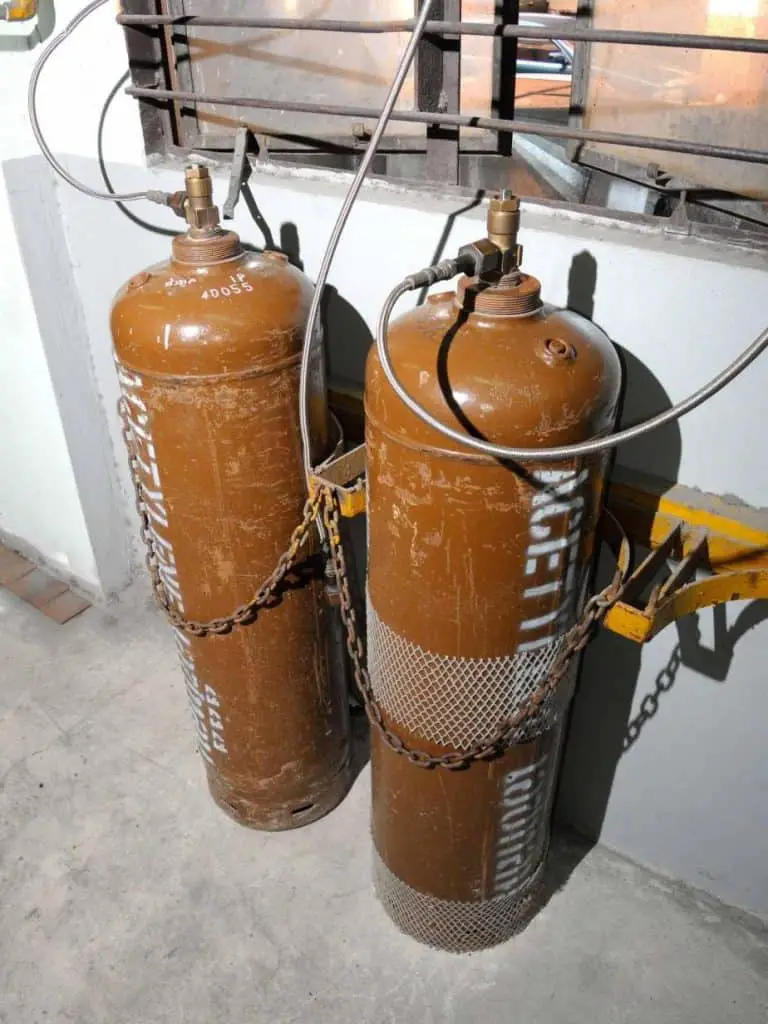
These cylinders are usually painted black, and they are filled with pressurized acetylene. They are also made of steel, and feature cylinder valves. You can find these cylinders in different sizes, from ten cubic feet to almost four hundred cubic feet. The acetylene cylinders have a ventilated filler material that operates when moisturized with acetone, pressurizing, and holding the acetylene.
Remember, you’ll need to use your Acetylene cylinder in the upright position at all times because you don’t want any acetone to escape from the tank. When you open the cylinder valve, only open it a maximum of one turn so that the valve wrench is still on the valve, just in case you need to turn the cylinder off right away. Also, just as you would with the oxygen cylinder, you’ll need to make sure your acetylene cylinder valve is clean before you attach the regulator.
Component 2: The Torch
Your torch is made up of a handle, fuel gas valves, oxygen, and a mixing chamber. You can also use welding tips or a cutting attachment on the handle if you want to use those for welding, heating, or cutting. On your torch, there are tubes that oxygen and gas flow through inside of the handle area.
Those tubes then blend the material in the missing chamber, or at the tip. The tip is where the mixed gases are ignited so that you can weld. When it comes to mixers, both oxygen and the gas enter the torch at nearly equivalent pressures.
Component 3: Cutting Attachments
Whenever you use your cutting attachment, you’ll need to connect it to the end of your torch handle instead of the welding tip. When you insert the cutting attachment, you’ll be able to cut metal that’s as thick as eight inches. If you need to cut a piece of metal that’s thicker than eight inches, then you’ll need to grab your cutting torch instead of your cutting attachment.
You can adjust the fuel necessary by using the fuel gas valve on the torch’s handle. To do that, you’ll use the oxygen valve on your torch handle and open it all the way. That way, the oxygen flow can preheat your flame, and all you need to do is adjust the oxygen valve on your cutting attachment to do this. You’ll then be able to control the cutting oxygen level by using the lever on your accessory.
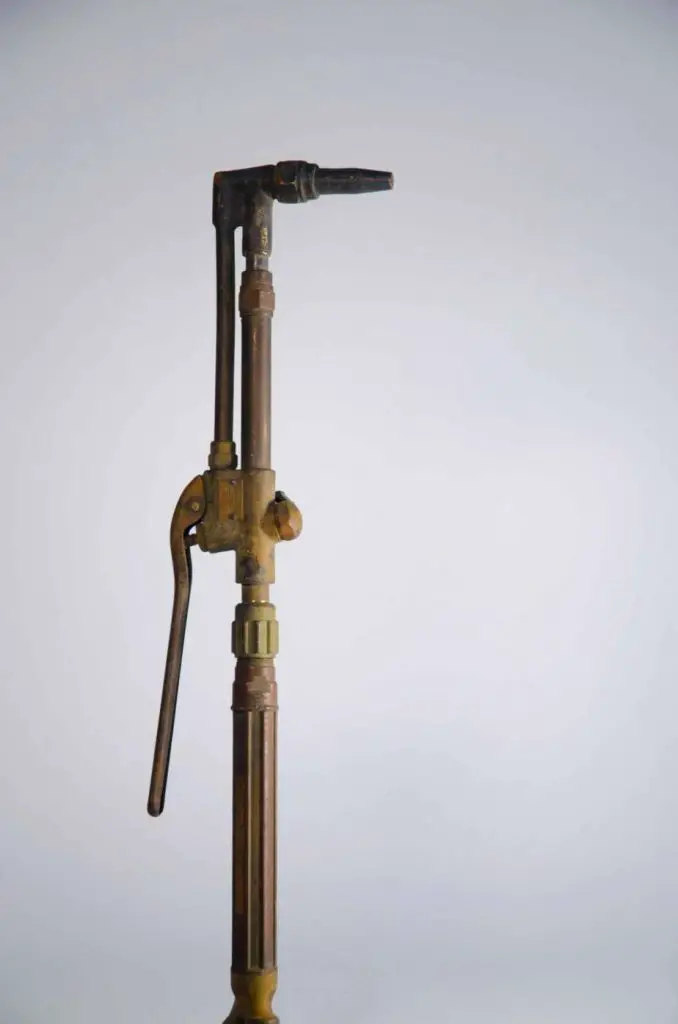
Component 4: Cutting Torch
When it comes to welding with a blowtorch, you’ll also need to know some information about how your cutting torch operates. When you use your cutting torch, you connect it to the hoses instead of connecting your welding handle. Once you have the attachment ready, you can use it to cut thick pieces of metal that your cutting attachment might not be able to handle.
Much like the welding handle that goes on the same attachment, your cutting torch also has oxygen and fuel gas valves with a level that allows you to control your cutting oxygen at the tip. Some cutting torches come as two-tube models, which helps the oxygen and fuel gas to combine and then come out at the tip for a stronger cut.
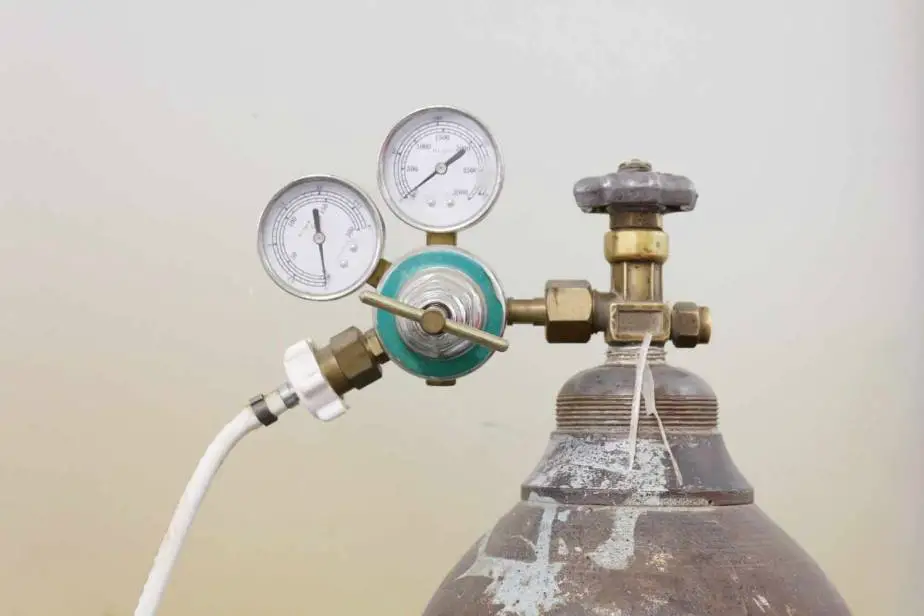
Component 5: Regulators
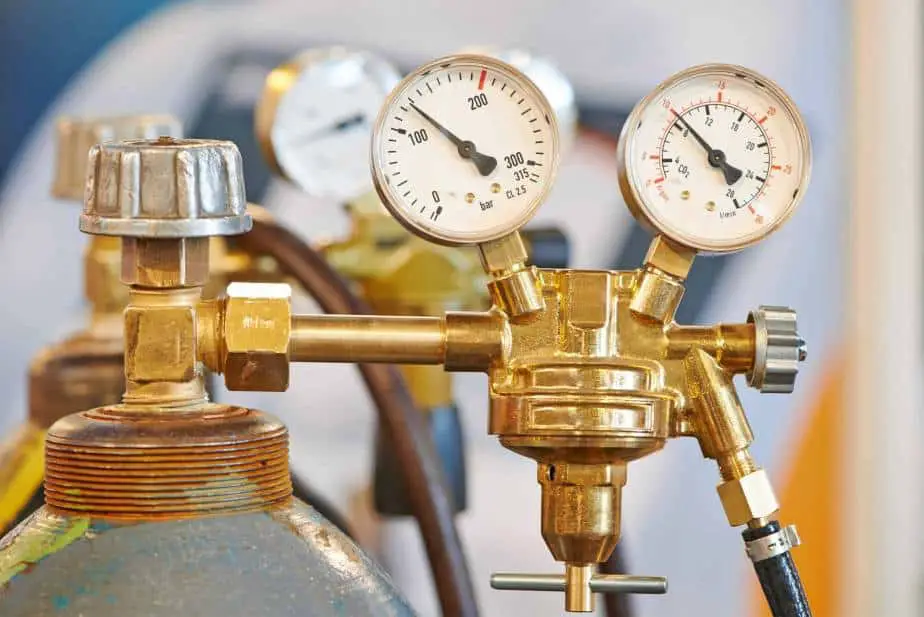
Regulators are also essential components when it comes to learning how to weld with a blowtorch. When you are using a lot of pressure in your acetylene cylinder and oxygen cylinder simultaneously, you’ll need to find ways to bring down the loads so that you can work more effectively with your torch.
That’s where an adjustable pressure reducing regulator can come into the picture and help you. With this regulator, you’ll be able to keep a steady working pressure even as your cylinder pressure starts to drop. So, a regulator admits the high cylinder pressure by guiding it through a valve that works with a flexible diaphragm. When you turn the regulator’s adjustment knob, a spring activates in the regulator to operate the diaphragm, and that either opens or closes the regulator’s valve to regulate the outlet’s pressure and flow.
Most standard regulators use two gauges. One gauge demonstrates the inlet pressure inside the cylinder, known as the high-pressure gauge. The other part, known as the low-pressure gauge, monitors the working force that the regulator is supplying. However, gauge-less regulators do exist, although they usually handle more heavy-duty jobs that you wouldn’t be performing at home.
Single Stage and Two-Stage Regulators
Most blowtorches use one of two primary regulators, either a single-stage regulator or a two-stage regulator. Both of these types of regulators perform the same kind of operation, but if you can opt for a two-stage regulator, you’ll get a more constant pressure. That’s because, with a two-stage regulator, the cylinder pressure drops are handled better when compared to a single-stage regulator.
Two-stage regulators are often found in heavy-duty construction zones, and last longer than a single-stage regulator. Two-stage regulators also require less maintenance overall when compared to a single-stage regulator. It’s easy to identify a two-stage regulator because they have a second pressure chamber on them. On the other hand, single-stage regulators only have one pressure chamber.
Remember, when working with oxygen and acetylene regulators, they require different connections to different cylinders, so you should never mix these up. To help you understand how to identify the various regulators, remember that oxygen regulators use right-hand threads. On the other hand, acetylene regulators and other fuel gas regulators will all have left-hand threats.
Component 6: Welding Hoses
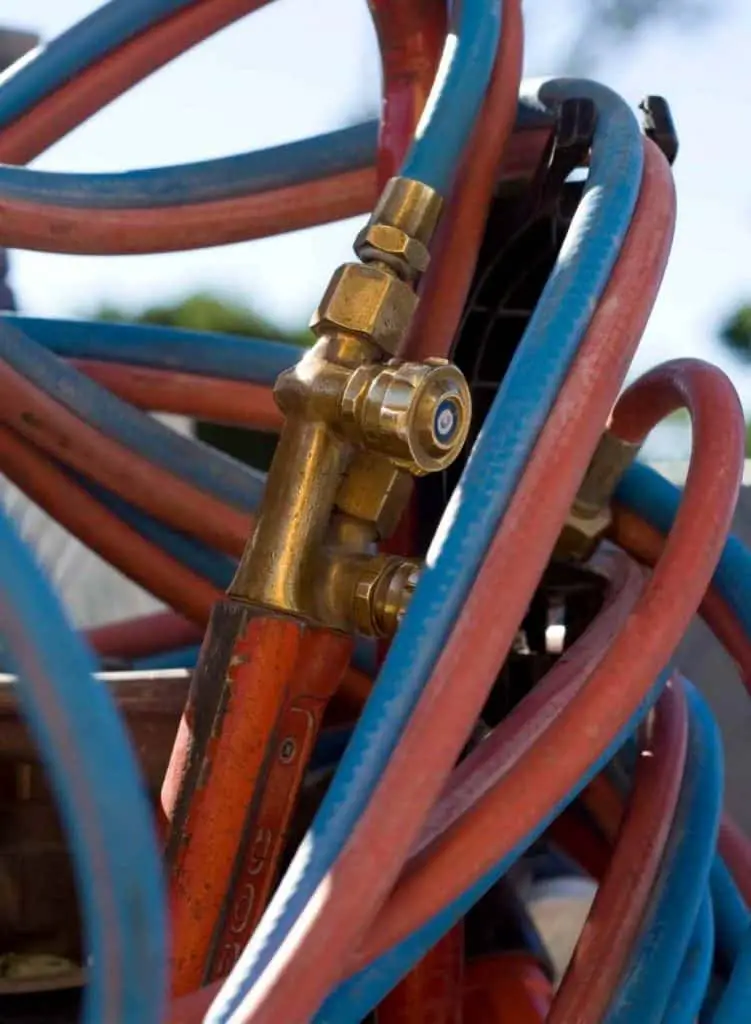
We mentioned earlier that a double line rubber hose would connect your cylinder regulators and torch. Some people also call the double line house “type VD” hose. On the tube, you’ll see a green line, which is for oxygen. The red line is for fuel. You can also get different types of double line hose for acetylene, including:
- Grades R and RM, which should be used with acetylene only.
- Grade T, which is used with fuel gas.
You’ll need to mark all hoses with the hose’s service use, like light, standard, or heavy.
Component 7: Check Valves
Remember, check your valves when they are installed between your hoses and the torch to make sure you don’t wind up with any backflow. If you do, they won’t close if you start reversing the flow. You should use check valves with all torches. Keep in mind that when combusting happens, you need to mix fuel with oxygen, and you only want to do that in the torch mixer or torch tip. Occasionally, oxygen and fuel can kick back into the hoses and cause combustion, which is something you want to avoid.
Component 8: Flashback Arrestors
A high-pressure flame in the hose, known as a flashback, can take place if you aren’t using check valves, or if you experience check valve failure because you didn’t install your check valves correctly. Once a flashback begins, your check valves won’t be able to stop it. However, you can prevent a flashback with a flashback arrestor.
Connect your arrestor the same way as you connect your check valves. So, put them in the hose at the torch, or in the regulator. Your arrestor will have a spring-loaded trap that will activate and shut down the gas flow if a flashback starts. Keep in mind that check valves and flashback arrestors are relatively affordable, should always be used, and will do a lot to increase your safety.
Now that you understand all of the parts of your blowtorch and how to use them, we’ll cover, in a few brief steps, how to weld with a blowtorch below.
Steps for Welding with a Blowtorch
Once you know how to use all of the parts in your welding blowtorch, you are then ready to start welding. Follow the easy steps below to get started.
Step #1: Grab Your Safety Gear
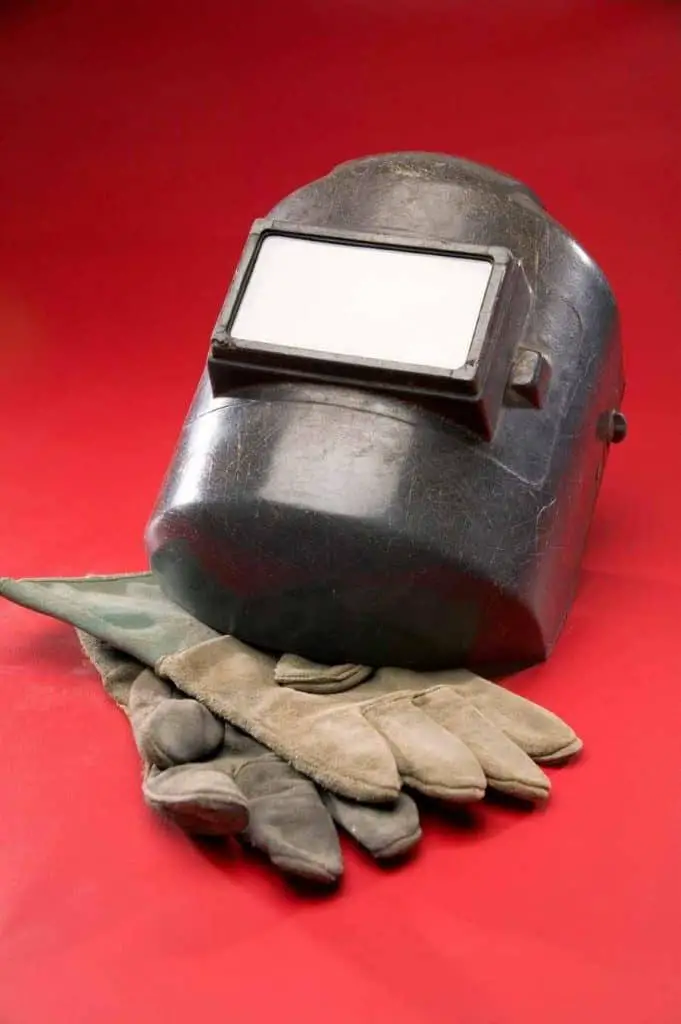
Before you start, you’ll need to suit up for your welding project. Get your protective clothing on, including long pants, a long-sleeved shirt, welding goggles (we recommend the Servore 513 welding goggles found here), and welding gloves. Remember, it’s always better to be safe than sorry!
Don’t forget to check out or recommended gear here!
Step #2: Get Your Work Space Ready
Now you’ll need to prepare to light your torch. Before you do that, make sure you have a well-ventilated, open workspace that’s prepared and ready to go. Then, you’ll turn the fuel adjustment knob on to start. You’ll find that knob on the smaller of the two tanks the torch has. Make sure you slowly turn the knob about a half-inch and release the gas.
Step #3: Clean Your Materials
You’ll need to clean the pieces of metal you want to weld. Make sure there is no rust, dirt, or debris. Clean your materials until you know they are prepped enough for welding.
Acetone and steel brush your area up good. You don’t want too much debris on anything you weld if you can help it.
Step #4: Light the Torch
To light your torch, tilt your lighter, so the fuel is trapped, and then slowly and carefully light your flame.
Step #5: Modify the Size of Your Flame
Now you’ll want to open the oxygen valve slowly and slightly until you get the correctly-sized flame. If your fire has blue edges, then it’s a steady flame, and that’s a good sign.
Step #6: Put the Flame on Your Weld
After you’ve modified the size of your flame, you’ll need to slowly move the torch to the spot you want to weld. Make sure you move evenly side to side to make your weld look and set. Be careful not to hold the flame too close, or you may wind up creating holes in your materials. However, if you keep the fire too far away, you’ll also experience other issues, like the metal not melting.
To remedy this, move your torch evenly and pay attention to ensure you are getting the weld you want. As long as you are paying attention, you can always adjust and with practice, you’ll come out stacking dimes.
Final Thoughts
Now that you know the background on torch welding, some of the fundamentals about torch welding, the parts involved with torch welding, and the steps you’ll need to take when you want to complete a torch welding project, you should be ready to start welding with a blowtorch today.
Get out there and get practicing!