This post contains affiliate links to products, services, or education. We may receive a commission for purchases made through links.
So you bought your new MIG or MAG welding machine a while ago and already did some fun projects in your driveway. To challenge yourself further, you looked up harder welding techniques online and found symbols that look like hieroglyphics. Do not let them discourage you: welding symbols, as they are actually called, are not as difficult to decipher as they look.
What are welding symbols? Welding symbols explain how to perform a particular type of weld using a simple diagram. The symbols are universal and understood by all trained professional welders so projects can be completed safely and efficiently.
This way anyone, no matter what language they speak, anyone can visualize how to do a weld and learn it easily. Keep reading to learn how to interpret welding symbols and get a basic run-through of some of the common iterations.
How Do You Read Welding Symbols?
Think of welding symbols as step by step instructions organized into diagram form for your convenience. The different steps tell you a different aspect about how to make the weld possible. The steps are organized as the following:
- A drawing of the welded joint itself
- Arrow
- Leader line
- Reference line
- Weld symbol (not synonymous with “welding symbol”)
- Numbers along the reference line
- Tail
Here’s a simple video to help explain what we’ve written below:
1. Drawing of the Welded Joint
The first part of the welding symbol is simply a drawing of what the finished product should look like. It features a basic depiction of a metal joint with the weld in all black. It will include any and all patterns so that the rest of the symbol makes sense.
2. Arrow
At the very end of the line sits the arrow, which points you towards the joint. This makes it clear in what order you are supposed to read the symbol. This may seem obvious, but the arrow can indeed change directions. Why? Welding patterns are only applicable to certain joints and metal; there is no pattern that works for every single weld. For example:
- An arrow pointing down and to the left might be referring to a basic floor joint.
- An arrow pointing inverted down and to the right would be for a convex joint.
- An arrow pointing up would typically be for a weld near the ceiling or otherwise fighting against gravity (usually a stronger weld).
3. Leader Line
The leader line simply connects the information you learned from the reference line to the arrow. There is usually no additional information here; just connecting the dots and sending you in the right direction.
4. Reference Line
After you observe the arrow and drawing, the next place your eyes should go is the reference line. The line itself does not convey much, but rather where items of information are placed on it. For example, staggered weld symbols would mean a pattern weld. Most importantly, items above the line always refer to the joint on the other side of the metal (facing away from you), while items below the line always refer to the joint on your side of the metal (facing towards you). This is regardless of the positioning of the arrow.
5. Weld Symbol
The weld symbol, outside of the drawing, is the most important part of the welding symbol. This tells you what kind of weld you will actually be doing, represented by shapes such as:
- Rectangles
- Squares
- Triangles
- Lines
- Circles
- Many variations of the above, with or without lines through them or next to them
More on the meanings of those shapes later. In the meantime, to issue a clarification, the “weld symbol” is the shape representing the type of weld, while the “welding symbol” refers to the entire drawing as a whole.
6. Numbers
Although not always, you will commonly see one or more numbers on or below the reference line, surrounding the weld symbol. Any number to the left of the weld pattern is the width of the weld, while the number of the right represents the length. This is usually when the weld is broken up into a bunch of smaller welds; it is not one smooth line. The orientation of these numbers corresponds to the same dimension (width or length) regardless of whether they are above or below the reference line.
7. Tail
As great and organized as welding symbols are, not everything fits perfectly into a neat little line diagram. The tail is where engineers could let their welders know of any additional notes or tips that would not normally fit within the reference line construct. If nothing needs to be in the tail, it is often left off.
What Do Weld Symbols Mean?
As mentioned earlier, the shape of the weld symbol tells you what kind of weld you will be doing. Let’s go through the most common ones so you know what you are in for.
Rectangle
A rectangle tells you that you will be doing a plug or slot weld. This is probably the most standard kind of weld you can think of: alight the two pieces of metal together so just a small gap between them exists. Then plug the gap.
Square
The square weld is actually an offshoot of the rectangle weld. However, in addition to the two pieces of metal being parallel to each other, they must also lie flat on the same plane. That ensures the joint is parallel in both directions, like a square.
Triangles
There are a lot of variations on the triangle symbol, but here is the basic idea: the triangle weld (also known as a fillet weld) symbol refers to the welding of two pieces of metal that are perpendicular to each other. Examples would include:
- Floor to wall
- Wall to ceiling
- Table to beam
The name refers to its shape: because it sits within two perpendicular metals, it resembles a right triangle. The slightly different triangle shapes depend on the strength of the metals at hand.
Lines
Lines can exist on the reference line for a variety of different reasons. Let’s go through some of them briefly. Just remember, all of these lines refer to the pattern you should take with the weld:
- V: A “V” shaped weld. You should weld two lines at equal length gradually moving apart from each other on the same angle.
- Bevel: Similar to the V, but one line is straight down and another is on a much wider angle across.
- U: Start with a straight line, then branch off into a U shape.
- J: This name is misleading. The J weld symbol actually refers to more of an “h” shape (lowercase).
Circles
A circle weld symbol is a spot weld. You weld one particular spot and move on, though there are various options to make this bigger or smaller. This can be used for anything from filling in a screw hole to plugging a significant gap from rust. If the reference line goes through the arrow, make sure you weld on both sides of the joint.
Variations
Of course, not every weld symbol is one particular weld. Sometimes it can be only part of a weld symbol, or even multiple symbols on both sides of the reference line. Just remember, follow what the welding symbol visually says, and you will be in great shape.
What Are the Basic Welding Symbols?
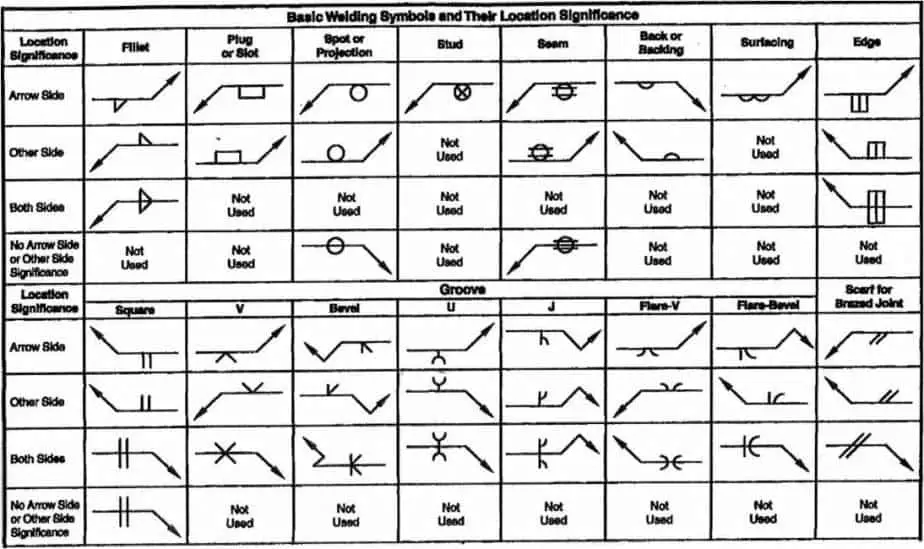
Although the weld symbols listed above should give you a pretty good idea of some common welding options, there are other welding symbols as a whole that are also rather common. They exist as interesting variations on these shapes. Here are a few:
- Stud: A circular weld with an extra mark through the middle
- Back or Backing: A half circle only weld. Mainly for touch ups.
- Edge: Making two rectangles with a small gap in the middle for separate weight distribution.
- Melt through: A back weld where the flame is held on for an extra amount of time to actually melt the metal all the way through.
- Field weld: The symbol will feature an additional flag on the reference line, indicating that this weld is meant for on the job or away from the original manufacturer location. While stronger welds can be done in the factory, this is the best one given a mobile welding device and not necessarily ideal conditions.
Where Will You Be Using Welding Symbols?
Most of the time you will be referring to welding symbols, they most likely will have a field weld marking. Why? Well, if you were welding the exact same stuff in a factory all day, what do you really need to be look at a welding symbol all the time for? Therefore, welding symbols were primarily designed so that field welders know what to do when they go out to fix and create various projects. Here are some real-world applications of these welding symbols:
Ship Building and Boat Building
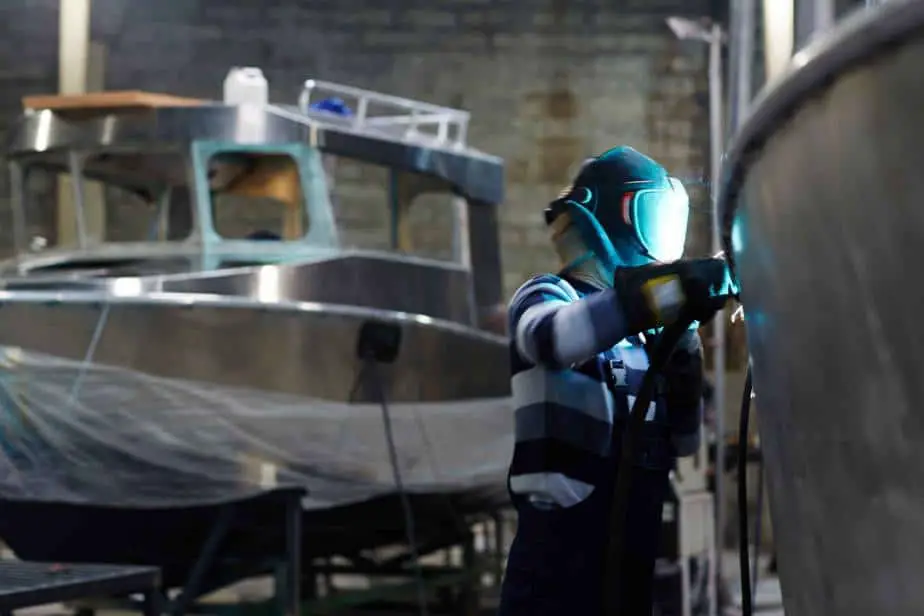
Boat and ship hulls bound together by just nuts and builds will not exactly have the best odds of staying afloat. To keep them afloat, steel panels need to be welded together. The best way to do that is with a rectangle weld. That way the panels are tightly and permanently bound together as one hull with no gaps for water anywhere in between.
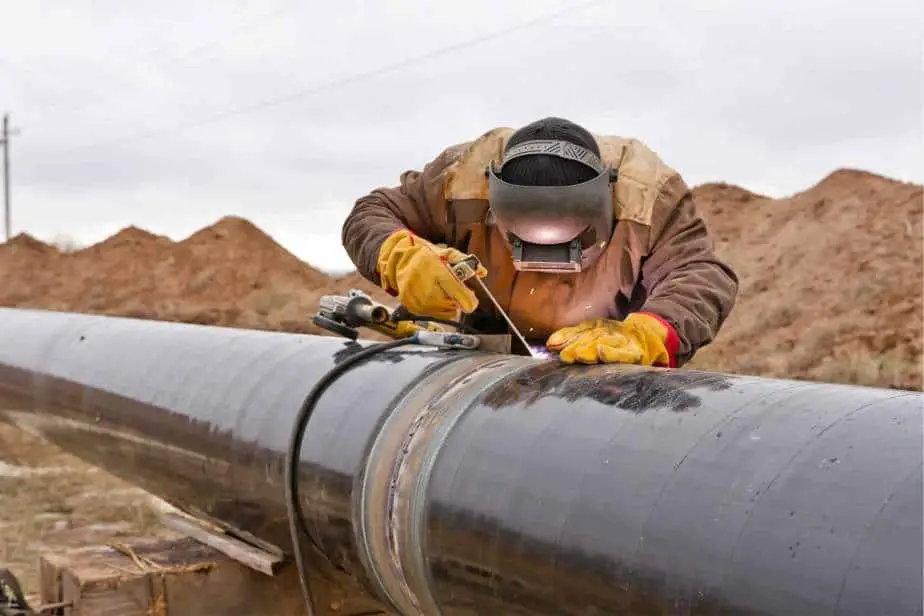
Pipelines
Similarly, pipelines need to be waterproof or, in this case, oil and gas proof. Each piece of the pipe needs to be welded together with a rectangle weld.
Commercial Construction
Residential homes have the luck of being able to be built with wood. That is not the case for commercial buildings, which by law have to be built with metal to keep them safer from:
- Fire
- Earthquakes
- Weight problems (depending on the type of business occupying the space, such as a factory)
The beams in these commercial buildings are typically bound together through welding. While other types of welding can occur depending on the specific project, triangle welds are most often used to bond beams to the floors and ceilings.
Robotic Repair
Plenty of factories use heavy duty automated equipment like robots to carry out certain functions. When they suffer structural damage, they make require a welder to come in and do a circle weld to make specific repairs.
No Welding Symbol Can Save You from Bad Technique
No matter how detailed these symbols are, you need to make sure you are welding correctly before you can move on too these advanced types of welds. Make sure you are not making these kinds of mistakes when you weld.
Not Cleaning Your Work Area
Make sure you clean off or at least dust off:
- Your tools
- Workstation
- Metals
Before you begin. If items are dirty, you will not be able to get a clean, smooth weld. That will make line and specific dimensions especially difficult. If the metal is not clean, you will be able to tell: your machine will make a jagged, uneven sound. It should run nice and smooth, allowing for precise movement.
Incorrect Voltage
Make sure the voltage on your welding machine is not set too high or too low. It is awfully hard to get a precise weld when you are barely even leaving mark on the metal. Or worse, burning right through it. High voltage can also cause:
- Too much wire being released, cause it to spread unevenly in big globs
- The marking itself to be vastly uneven since you will have trouble controlling it
- Wasting of gas
Travel Speed Wrong
When it comes to welds based on welding symbols, take your time. These are often complex techniques that require a lot of precision. The last thing you want to do is rush through it and damage the metal or ruin the weld. There are no do-overs in welding.
Material too Thick
Even if you are following the welding symbol absolutely correctly, you may find that the weld is not holding like it should. If that be the case, it might just be that the metals you are trying to weld are too thick. Carefully try turning the voltage up, or just do another pass or two until it holds.
Metal too Weak
On the other hand, sometimes the metal is too old and worn to be welded, even though it is technically the right material. This could be from wear and tear, or perhaps from rust. Welding will actually break the metal in this case. Instead, try removing weak and rusted pieces and try again. If that fails, it might have to be a job for nuts and bolts.
Gap too Wide
As big as your voltage is and however many passes you do, it will not matter if the gap you are trying to weld is simply too big. Make sure you use clamps too hold metal together if need be, then perform your weld.
Wrong Angle
You generally do not want to aim straight on, since it will be hard to move along the joint. Similarly, holding your welding gun at too low of an angle will make it impossible to aim. Try going for a 20 to 30 degree angle for the right combination of careful speed and accuracy.
Safety Tips
Lastly, make sure you are being safe while you are welding. Just because you have graduated past your driveway to welding symbols does not mean you should throw caution to the wind and rush through things. Make sure you always:
- Wear a welding helmet (check out our recommended welding helmets here)
- Wear gloves
- Weld on a safe surface
- Follow manual instructions
1. Wear a Welding Helmet
Wearing a helmet is absolutely the most important thing to remember when welding. This will prevent eye damage from:
- Sparks flying
- The extremely bright lights
- Gases and other chemicals
There is no excuse to not wear a welding helmet, especially considering how easy it is to see in them now and how cheap they have gotten.
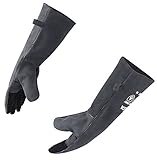
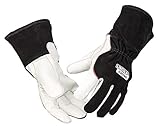
2. Wear Gloves
In addition to a welding helmet, make sure you are not just using any old gloves. Special welding gloves should be worn at all times. If you are worried about precision on your welding symbol-based projects, consider one of these pairs:
- WZQH – These gloves are super thick for your safety but still made with comfortable material. Comes with wear resistance protection and extra long to cover enough of your forearms.

- RAPICCA – These are a similar price point but impressively can handle up to 932 degrees Fahrenheit of flames in case you make a mistake (but hopefully not). Impressively offers four layers of protection.
- Lincoln Electric (we like these a lot)- Although they do not seem to be for 100% of the welding jobs out there, they will give you a lot more dexterity for those tough welding jobs.
3. Weld on a Safe Surface
As skills improve, the risk of carelessness increases. Always make sure you weld on a safe surface, like on concrete or a safe metal table that is rated for such a use.
4. Follow Manual Instructions
Even though your skills have come a long way, simply glancing at the welding symbol is not the be all end all of performing a successful weld. Make sure you check your instruction manual before observing a new welding symbol, as it may have advice pertaining to which specific gas or voltage would work best given that specific welder.